Next: 5 References Up: Appnotes Index Previous:3 Summary
![]()
![]()
![]()
![]()
Next: 5 References
Up: Appnotes Index
Previous:3 Summary
The RASSP Enterprise System is invoked by entering the following command at the prompt:
> projlist &
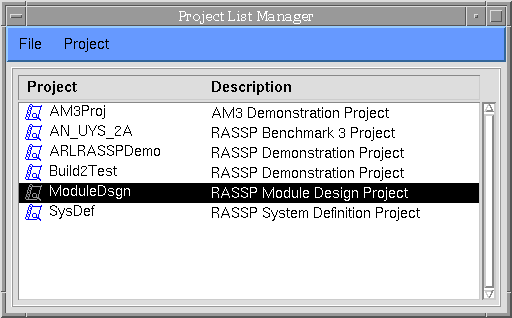
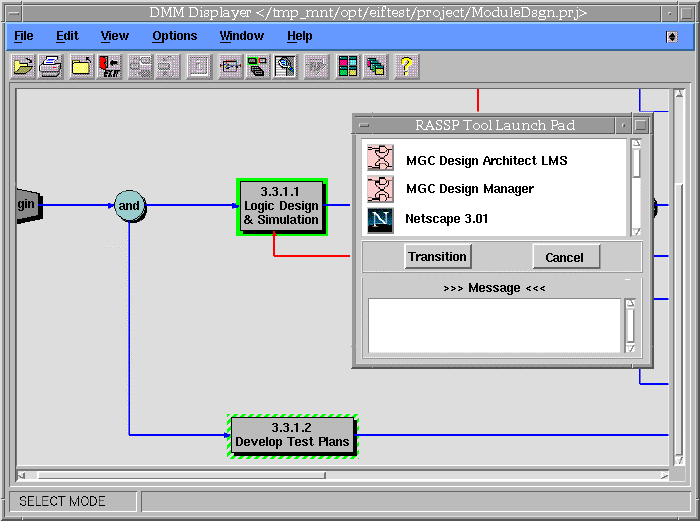
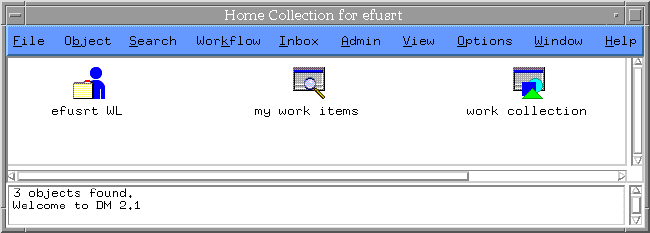
When a project is selected and executed, the DMM Displayer and the AIM Home Collection windows are displayed as shown in figures 4 - 2 and 4 - 3. The DMM Displayer contains the workflow that is attached to the project being executed. Since the RASSP Module Design Project was selected in the Project List Manager, the workflow contained in figure 4 - 2 is the workflow that's attached to that project. The AIM Home Collection window is the user interface to the PDM tool.
Workflows in DMM are executed by placing the cursor on a task that's "startable" and double-clicking the left mouse button. "Startable" tasks are highlighted with a dashed green border. This invokes the task and runs the "autoscript" and "toolpad" utilities. Autoscript is a custom developed utility, which enables DMM to communicate with the AIM PDM tool, for the check-out and check-in of business items. When a workflow task is invoked, the business items defined for that task are checked-out of the AIM PDM tool and placed in either the user's private work location or the shared work location. If the business item is defined as shared, it is checked-out into the shared work location. If the business item is defined as private, it is checked-out into the user's private work location. Business items are defined as shared when multiple engineers need access to it within the same workflow task. Such is the case with a Mentor Graphics design database or an RDD - 100 design database. Business items are defined as private when only one user per workflow task needs access to the data. AIM business items are defined, for each task, when the workflow is being developed in DMM Builder.
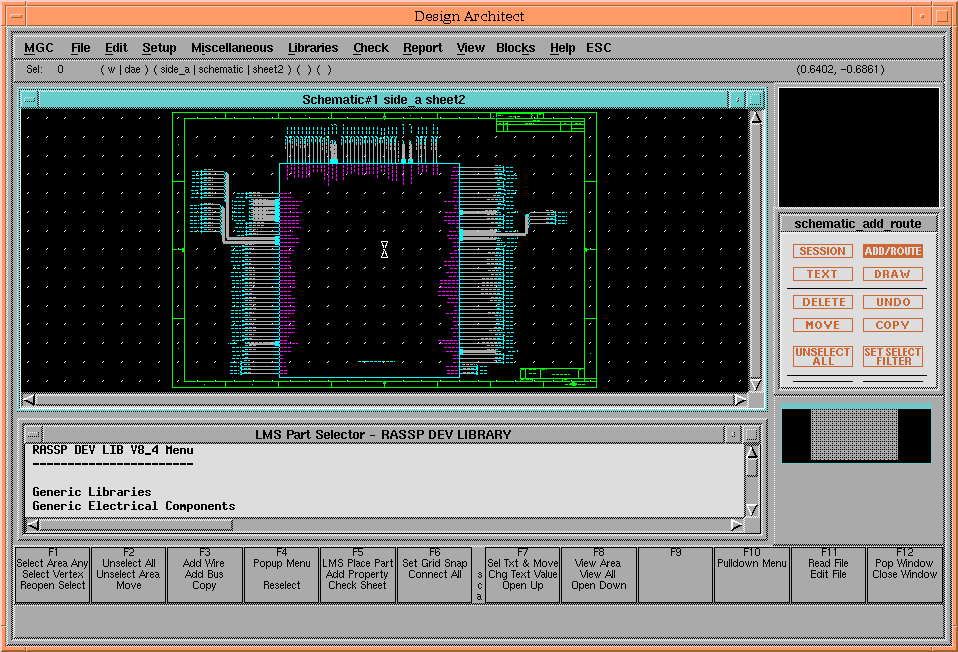
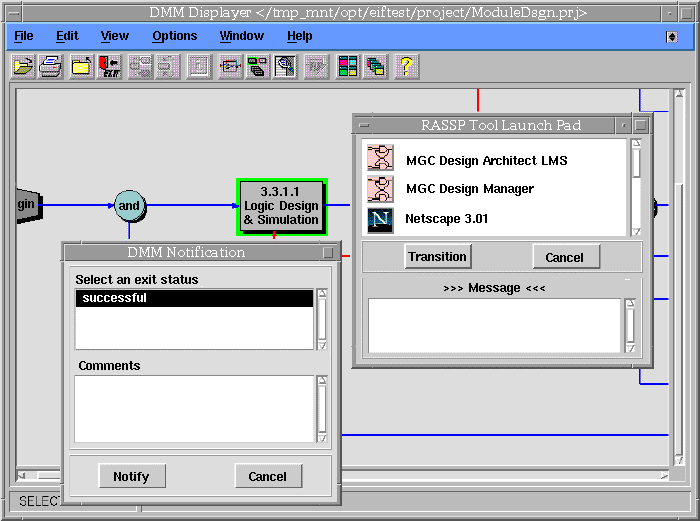
When the autoscript utility has successfully completed, the toolpad utility is executed. The toolpad utility is also a custom developed utility which will display the RASSP Tool Launch Pad. If the autoscript utility does not complete successfully, the toolpad utility will not be invoked. Instead, error messages will be printed in the shell window from which the Enterprise System was invoked. The RASSP Tool Launch Pad contains a list of CAD tools that may be invoked for that task. Figure 4 - 2 shows the Tool Launch Pad for workflow task 3.3.1.1 Logic Design & Simulation. The CAD tools that have been encapsulated for this task include MGC Design Architect LMS, MGC Design Manager, and Netscape 3.01. To invoke these CAD tools from the Tool Launch Pad, place the cursor on the CAD tool's icon and single click the left mouse button. The encapsulated CAD tools can be invoked as often as necessary. The "Messages" window at the bottom of the RASSP Tool Launch Pad is where any error messages associated with the invocation of the CAD tools will be displayed. Figure 4 - 4 shows the MGC Design Architect LMS tool which was invoked by single-clicking on that tool's icon. Once the tool is invoked, it is used to design the FPCTL module as shown in figure 4 - 4.
When all the work has been completed for the "in-progress" task, the workflow is transitioned by placing the cursor on the "Transition" button, within the RASSP Tool Launch Pad, and single-clicking the left mouse button. This causes the DMM Notification window to be displayed, from which an exit status must be selected. Figure 4 - 5 shows the DMM Notification window that's displayed after pressing the "Transition" button on the RASSP Tool Launch Pad. Since workflow task 3.3.1.1 Logic Design & Simulation has only a successful exit path, it's already highlighted by default. Simply place the cursor on the "Notify" button and single-click it with the left mouse button. This will invoke the autoscript utility again to check the business items back into the AIM PDM tool along with any and all new data files that were produced as a result of this task. It will also automatically generate and send email to the project leader informing him that the workflow task has been completed. When the business item check-in has completed, the workflow will transition to the next task. Placing the cursor on the "Cancel" button in either the DMM Notification window or the RASSP Tool Launch Pad and single-clicking the left mouse button will terminate the execution of the toolpad utility. If this happens, the toolpad can be re-invoked by simply double-clicking on the "in-progress" workflow task. Also, the workflow cannot be transitioned while CAD tools are still running. If an attempt is made to transition the workflow while a CAD tool is still running, an error message will be displayed prompting the user to first exit the CAD tools.
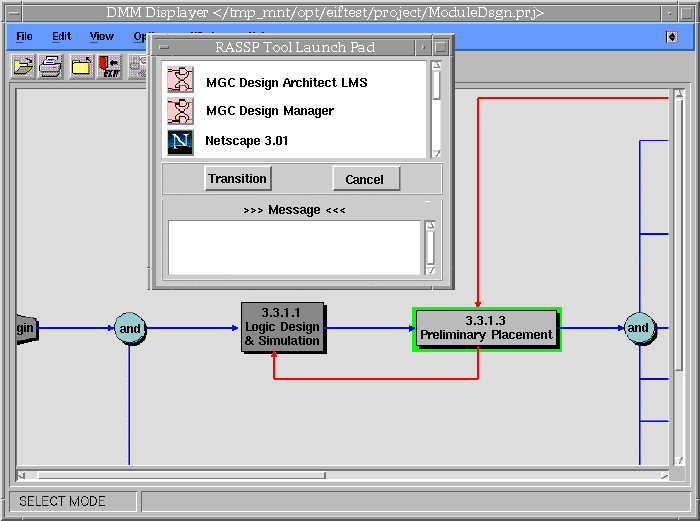
Figure 4 - 6, shown below, indicates the workflow has been transitioned to task 3.3.1.3 Preliminary Placement. Notice that task 3.3.1.1 Logic Design & Simulation has changed to a dark gray color. This indicates that task has been completed. Figure 6 also indicates that task 3.3.1.3 Preliminary Placement is already "in-progress" and the RASSP Tool Launch Pad is displayed listing the available CAD tools. Encapsulated CAD tools for this task include MGC Design Manager, MGC Layout, and Netscape 3.01.
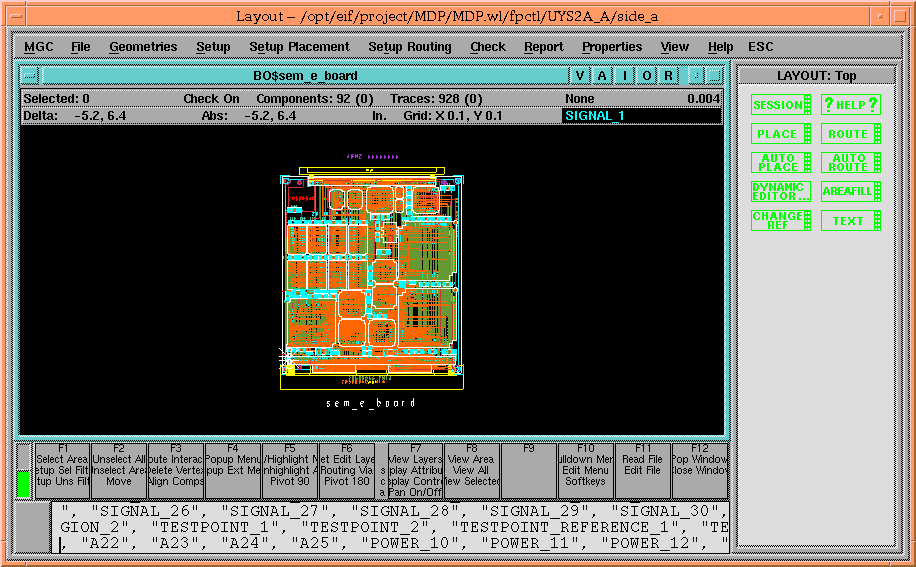
Figure 4 - 7 shows the MGC Layout tool which was invoked by single-clicking on that tool's icon. Once the tool is invoked, it is used to perform the layout of the FPCTL module as shown in figure 4 - 7.
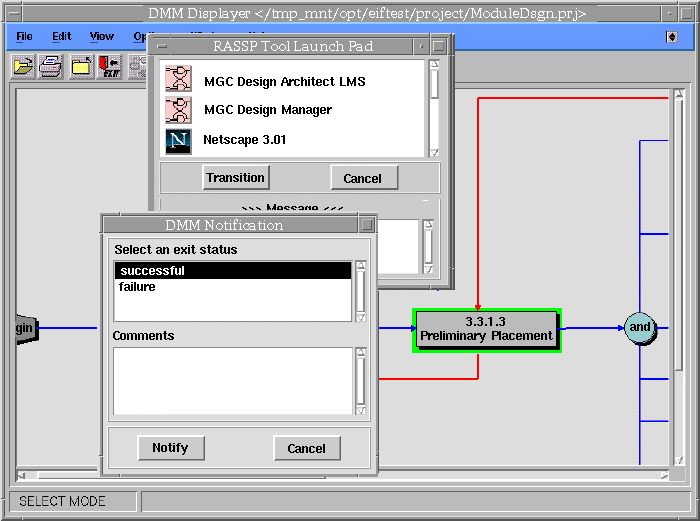
When all the work for task 3.3.1.3 Preliminary Placement is completed, the workflow will be transitioned by again placing the cursor on the "Transition" button within the RASSP Tool Launch Pad and single-clicking the left mouse button. This will again cause the DMM Notification window to be displayed, from which an exit status must be selected. Figure 4 - 8 shows the DMM Notification window for workflow task 3.3.1.3 Preliminary Placement. This time there are two exit choices - successful and failure. This is because there are two defined exits from the Preliminary Placement task. The successful exit is indicated by the arrow exiting the task from the right. The failure exit is indicated by the arrow exiting the task on the bottom and looping back to task 3.3.1.1 Logic Design & Simulation. The failure path would be selected if task 3.3.1.3 Preliminary Placement could not be completed successfully and required some rework in the previous task. Selecting the failure path would cause the workflow to transition back to task 3.3.1.3 Logic Design & Simulation. If task 3.3.1.3 Preliminary Placement has been completed successfully, the successful exit path would be selected. Figure 4 - 8 shows the successful exit as being selected.
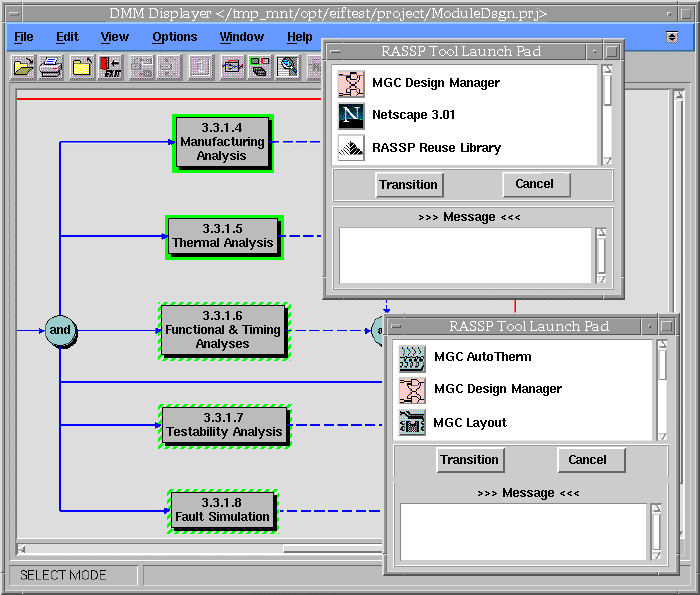
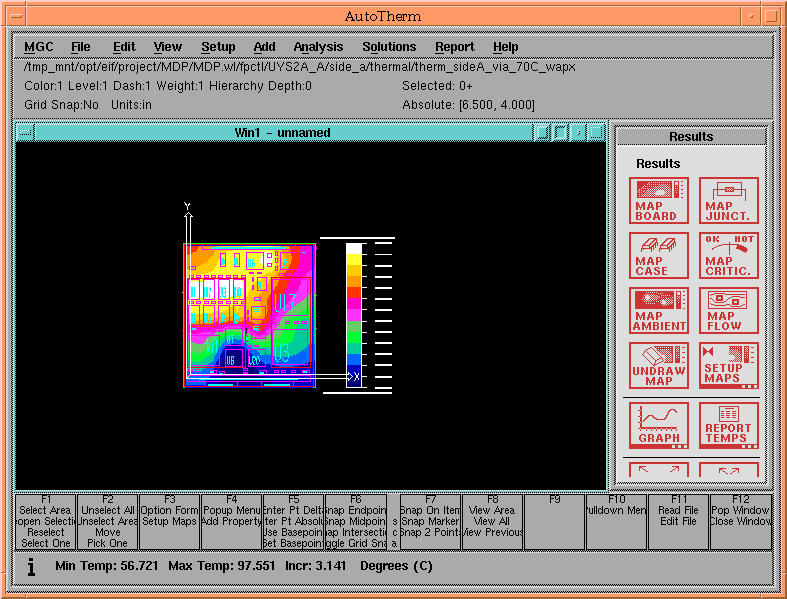
The next group of workflow tasks, shown in figure 4 - 9, are the different types of simulation and analyses that need to be performed on the module design. They are aligned vertically to indicate parallelism in the design process. Tasks 3.3.1.4 Manufacturing Analysis, 3.3.1.5 Thermal Analysis, 3.3.1.6 Functional & Timing Analyses, 3.3.1.7 Testability Analysis, and 3.3.1.8 Fault Simulation can all be performed in parallel by different designers. Since the RASSP Enterprise System supports distributed PDTs, it's not necessary for the designers to all be at the same site. Figure 4 - 9 demonstrates this by showing the Tool Launch Pads for tasks 3.3.1.4 Manufacturing Analysis, and 3.3.1.5 Thermal Analysis. Figure 4 - 10 shows the MGC AutoTherm tool which was invoked by single-clicking on that tool's icon for the thermal analysis task. Once the tool is invoked, it is used to perform the thermal analysis of the FPCTL module as shown in figure 4 - 10.
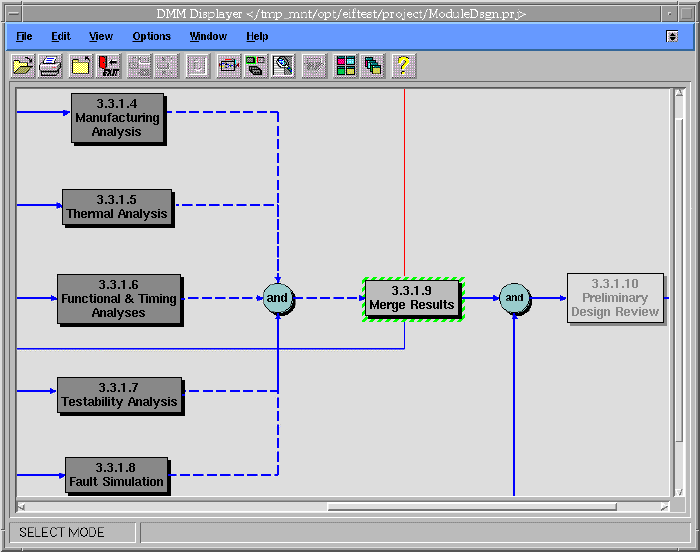
Figure 4 - 11 shows the remaining two tasks for the module design workflow. Task 3.3.1.9 Merge Results is the task where the results of the previous parallel analyses are merged together into one version of the design before being checked back into the AIM PDM tool. If there are no problems or issues to resolve, the design is baselined. If there are design issues and/or problems to be corrected, the failure exit from task 3.3.1.9 Merge Results can be taken which will fail the workflow back to task 3.3.1.3 Preliminary Placement. Taking the failback path will reset the parallel analyses tasks back to "startable" which means they will have to be performed again after making the appropriate design changes.
Task 3.3.1.10 Preliminary Design Review is the last workflow task to be performed. This is mostly a management task in which a design review is conducted. At the end of this task, the design is promoted up into the global workspace of the AIM PDM tool.
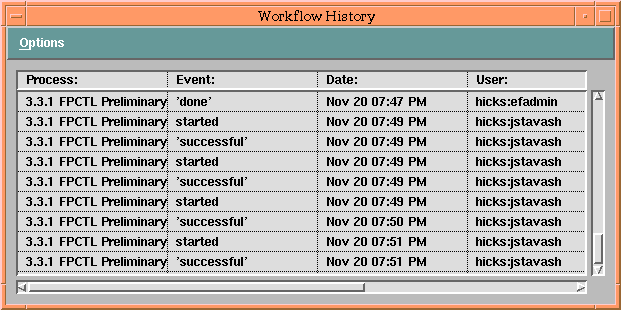
During project execution, DMM collects project metrics including the Process Name, Event ID, Duration, Actual Start Date, Actual Finish Date, User Name, and Number of Times Run. This information is shown in the Project History table in figure 4 - 12 above. The fields of this history table may be exported to a file for a comma-separated-value file format (.CSV). This file may then be imported into a project management tool such as Microsoft Project for additional project metrics processing.
4.0 System Demonstration
This section presents a demonstration of the RASSP Enterprise System. The demonstration will execute a module design workflow to design the FPCTL module for the RASSP benchmark 3 program.
![]()
![]()
![]()
![]()
Next: 5 References
Up: Appnotes Index
Previous:3 Summary